Water Key Installer: Additional Practice in Heat Control

Water Key Installer

If you recall in my post about the porting tool, I mentioned this concept a few times called heat control. It is important as techs that we are conscious of our heat control, regardless of how large or small the current project is.  Our handheld butane torches we use at our benches can reach up to 1,200ºF, which is quite toasty! Considering brass anneals typically around the 600º-800ºF range, this is why it is so important we understand this concept. I may even be overstating it, but that is just how important this is to me.

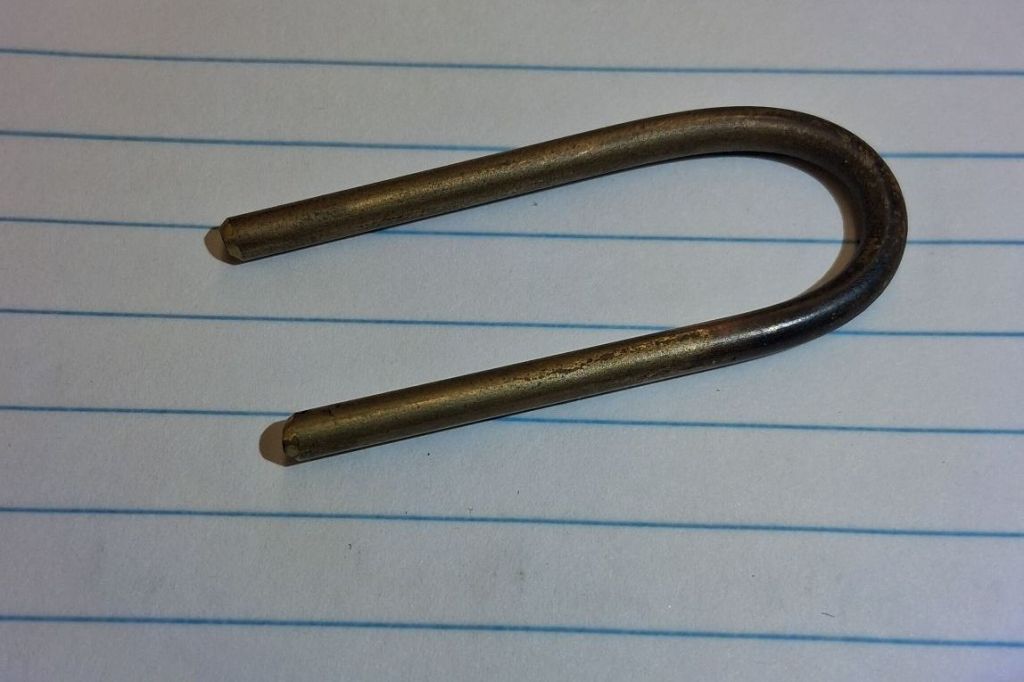
We created this little tool to help us install water key springs easier. Because the metal in those springs is so small, it can cause small yet serious cuts in your fingertips. We need those fingertips to be in as great of condition as possible!

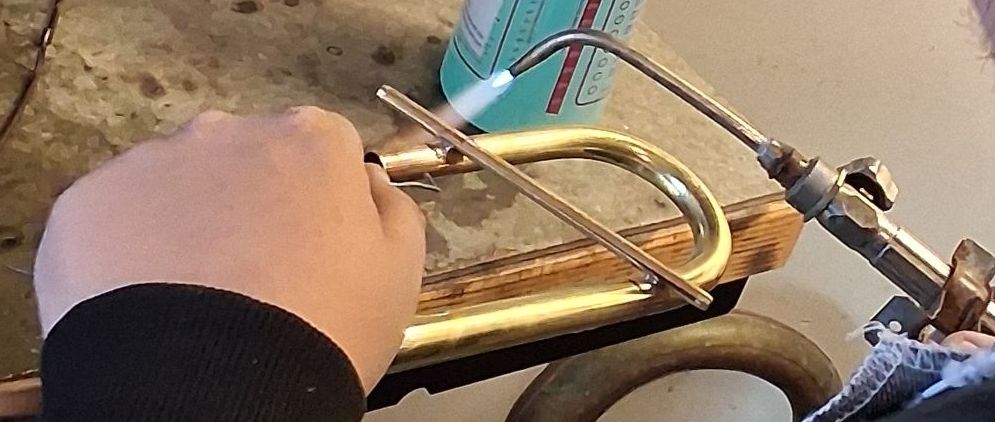
All we do is heat up the small brass rod in the middle (as well as around the middle, make sure you are moving the torch around the material) to make it workable. Most of what we have done so far has been air-cooled, so this is a break in the mold by being the first project we quench in water.

This is a short update, but do not let it dismiss the utility of this tool. I did the water key project about two weeks ago & I still have multiple cuts on my hands from trying to handle the materials manually rather than relying on my tools. This little piece of brass will be a lifesaver!

Don’t forget to subscribe (it’s free!).

Porting Tool & Intro to Soldering

Trumpet brace soldering

There are many aspects of instrument repair, & within those aspects exist multiple forms of themselves. For example, there are two types of soldering that we must become familiar & comfortable with in the field:

  • Soft solder
    • This solder is used in places we want to be secure & has a melting point of 360ºF. This is a mixture of low melting point metals, typically copper & tin.
  • Silver solder
    • This solder is used when we want permanent fixtures in places on the instrument & has a melting point of 1,200ºF. Part of the reason this a permanent bond is because brass aneals at 800ºF. This is a mixture of copper, zinc, & 50% silver.

Soldering is a major skill that we can take with us to other parts of our lives, but with solder the most important thing to consider is: the materials. We use lead-free solder across the board, so make sure you have the right product for the job!

The Porting Tool

During the construction of the porting tool.

As the name suggests, this is a tool that we must make to help us with porting. Porting is when you make sure the holes in the valve (called ports) are properly aligned with the slides. As you can imagine, anything that gives us more information in confined spaces is a huge advantage to us!

This project also reminds us why it is important to be picky during the construction of our tools. Not only will we be utilizing these tools often, but if thr angle of our pieces are off, it will be much more difficult to make proper.

This tool is made by filing a small notch into a piece of steel & soldering another much shorter piece into that. (Unfortunately, I did not document this process as I went through it.)

I think it is neat you can see how the two pieces are connected with the material. You want to make sure you are distributing your heat properly. Thicker parts will take longer to heat up, so make sure you angle your flame in a way that ensures success! Remember: the flame doesn’t do the soldering, touching the solder to hot metal is what does the soldering.

There are two more projects that discuss heat control: the water key installer & the brace bracket! Heat control is a massive part of what we do with band instrument repair, so it is important we understand how to do it well before we get our hands on a customer horn.

Don’t forget to subscribe (it’s free!).

Basic Beginning Project: Large Poker

The Daily Grind.

These next few posts will be showing the process of making multiple tools. It is my hope that by doing these project posts individually, I will be able to go into much more detail & and hopefully it’ll also be easier to look up in the future as well!

Before we are able to get our hands on an instrument for repair, we must first be familiar with what we have in the shop. While we do have thousands of dollars worth of tools at our disposal, repair techs will still fashion materials into extremely useful and versatile instruments for repair.

The Poker

The first project we made in class was known as: The Poker. This tool is just a saxophone needle spring in 3 inches of delrin rod (1/2″ diameter), but make no mistake; there are hundreds of practical applications for this tool.

Materials required for The Poker.

This project was also my introduction to using a bench motor. The first part of any project, aside from gathering materials, is to “face the stock,” which means we file down the edges to eliminate the potentially sharp or jagged edge. While holding the mill file firmly, the proper angles are: 45º, 10º vertical, & 10º horizontal.

Make sure you have your drop cloth under your bench motor to catch any materials!

After facing, we create the taper where the spring will eventually go. After we finish prepping the delrin rod, we grind the spring on the backside to make easier to insert to the delrin (we drilled a hole carefully in the middle).

The end result should look like this:

Finished Large Poker.

If your first poker isn’t completely straight, that’s alright! I, as well as many adjacent peers, had difficulty with this step. There will be plenty of time in the future to make more tools like this one!

The repair tech journey has officially begun! Next post will be about working with flames, my experience soldering, & a few new tools such as The Porting Tool!

Don’t forget to subscribe (it’s free!).